
Using a VPN on your phone takes about three minutes to set up. Download a VPN app from the App Store or Google Play, sign in, tap Connect, and your traffic is encrypted. That’s the short version.
The longer version matters more. Most guides stop at “tap Connect” and leave you with a VPN that looks connected but leaks your real IP address the moment you switch from Wi-Fi to mobile data. This guide covers both platforms — iPhone and Android — from first install to verified, properly configured protection.
What Does a VPN Actually Do on Your Phone?
A VPN (Virtual Private Network) routes your phone’s internet traffic through an encrypted tunnel to a server in another location. Your ISP sees encrypted noise instead of your actual browsing. Websites see the VPN server’s IP address instead of yours.
On a phone specifically, that matters for three reasons: you hop between networks constantly (home Wi-Fi, coffee shop hotspot, mobile data), you carry sensitive data like banking apps and email, and your phone’s apps often send data in the background without any visible indication.
What a VPN does not do: it won’t make you invisible to Google or Facebook, it won’t stop apps from tracking you through account logins, and it won’t protect you if you install malware. A VPN is a network-layer tool, not a complete privacy solution.
How to Use a VPN on iPhone (Step-by-Step)
The fastest and most reliable method on iOS is a dedicated app. Manual configuration through Settings is also possible, but it’s only worth doing for workplace VPNs or when no app is available.
Method 1: Using a VPN App (Recommended)
- Open the App Store and search for your VPN provider (NordVPN, ProtonVPN, Mullvad, Surfshark, or ExpressVPN are the established options with clean audit records).
- Tap Get to download and install the app.
- Open the app and sign in or create an account. Most paid VPNs require an account; a few privacy-focused ones like Mullvad let you use an account number with no email required.
- Grant the VPN configuration permission when iOS prompts you. This is a system-level request asking iOS to allow the app to manage network traffic. Tap Allow. You’ll confirm with Face ID or your passcode.
- Tap Connect or the large power button in the app. The app will auto-select its fastest available server.
- Verify the VPN icon appears in your status bar — it looks like “VPN” in small text near the signal indicators.
That’s a connected VPN. But there are two additional settings that change whether it’s actually protecting you.
Enable Always-On / Connect on Demand
Go to Settings > General > VPN & Device Management > VPN. Tap the (i) next to your VPN profile. Enable Connect On Demand. This tells iOS to re-establish the VPN before allowing other traffic when you switch networks, rather than defaulting to unprotected while reconnecting.
Without this, every time you lock your screen and unlock it on a new network, there’s a window where your real IP is exposed.
Enable the Kill Switch
Most VPN apps include a kill switch option in their own settings menu. In testing, I found that ProtonVPN and Mullvad’s iOS kill switches are the most reliable — they block internet access entirely if the VPN drops, rather than silently falling back to your real connection. Check your provider’s app under Settings or Preferences.
Method 2: Manual Configuration on iPhone
For workplace VPNs or providers without a dedicated iOS app:
- Go to Settings > General > VPN & Device Management > VPN > Add VPN Configuration.
- Choose the protocol type: IKEv2 (most common and supported natively on iOS), OpenVPN (requires the OpenVPN Connect app), or WireGuard (requires the WireGuard app).
- Enter the Description (any name), Server (the hostname from your provider), Remote ID, and your username and password.
- Tap Done, then toggle the VPN connection on from the main Settings screen.
Your provider’s website will have the exact server details and credentials under a “Manual Setup” section.
How to Use a VPN on Android (Step-by-Step)
Android gives you more configuration flexibility than iOS, which is both useful and a source of common mistakes.
Method 1: Using a VPN App (Recommended)
- Open the Google Play Store and search for your VPN provider. Install only from the official store — sideloading VPN APKs from third-party sites is a significant security risk.
- Open the app and sign in.
- Tap Connect. Android will show a system dialog: “VPN wants to set up a VPN connection that allows it to monitor network traffic.” Tap OK.
- Check your status bar for the key or shield icon indicating an active VPN connection.
Configure Always-On VPN in Android Settings
Unlike iOS, Android has a native Always-On VPN setting in the system settings that works independently of the app:
- Go to Settings > Network & Internet > VPN (path varies slightly by manufacturer — on Samsung, it’s under Connections > More connection settings > VPN).
- Tap the gear icon next to your VPN profile.
- Enable Always-on VPN.
- Enable Block connections without VPN (this is Android’s built-in kill switch).
Enabling “Block connections without VPN” at the system level is more reliable than the kill switch inside most VPN apps, because it’s enforced by the OS rather than the application.
Note for Samsung Users
Samsung’s One UI adds an extra layer: go to Settings > Connections > More connection settings > VPN instead of the standard Network & Internet path.
Method 2: Manual WireGuard or OpenVPN Setup on Android
For advanced users or corporate VPNs:
- WireGuard: Download the WireGuard app from Google Play, then import a
.conffile from your provider or scan a QR code. - OpenVPN: Download OpenVPN Connect from Google Play, import your
.ovpnconfiguration files, and connect. - Built-in (L2TP/IPSec): Go to Settings > Network & Internet > VPN > Add VPN. Note that L2TP/IPSec is considered legacy — WireGuard or IKEv2 offer better security and speed.
iPhone vs. Android VPN: Key Differences
| Feature | iPhone (iOS) | Android |
|---|---|---|
| Best setup method | Dedicated app + Connect on Demand | Dedicated app + Always-On in Settings |
| System kill switch | Via app only (no native OS switch) | Built in: “Block connections without VPN” |
| Supported protocols | IKEv2 (native), WireGuard (app), OpenVPN (app) | WireGuard (app), OpenVPN (app), IKEv2, L2TP |
| Split tunneling | Limited (provider-dependent) | Full support (most providers) |
| Free built-in VPN | iCloud Private Relay (not a full VPN) | Google Pixel VPN (Pixel 7+ only) |
| DNS leak protection | Varies by app | Varies by app; Private DNS option helps |
| Manual config path | Settings > General > VPN & Device Management | Settings > Network & Internet > VPN |
Common Mistakes (And What to Do Instead)
Assuming the app is enough
Installing a VPN app doesn’t mean your traffic is protected. The app has to be actively connected, and on iOS, it will disconnect when you lock your screen and switch networks unless you’ve enabled Connect on Demand. I’ve seen users assume they’re protected all day because they tapped Connect once that morning.
Using a free VPN
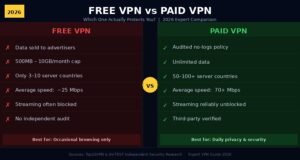
Research from Australia’s Commonwealth Scientific and Industrial Research Organisation found that 75% of Android VPN apps use third-party tracking libraries. Among free VPNs specifically, the incentive structure is inverted: if you’re not paying for the service, your data is often the product. Established free-tier options with audited no-log policies — like ProtonVPN’s free tier or Windscribe’s free plan — are a different category from random free VPNs on the Play Store.
Not testing for DNS leaks
Your VPN status icon can show “connected” while your DNS requests — the queries that translate domain names like google.com into IP addresses — route through your ISP’s servers. This is a DNS leak, and it exposes your browsing activity even with the VPN active.
Test at ipleak.net or dnsleaktest.com. With a properly configured VPN, you should see only your VPN provider’s DNS servers, not your ISP’s.
Ignoring the protocol setting
Most VPN apps default to automatic protocol selection. In testing across iOS and Android, WireGuard consistently delivers the best balance of speed and security. OpenVPN is reliable but slower and heavier on battery. IKEv2 reconnects quickly, which is useful on mobile where you switch networks constantly. If your provider lets you choose manually, WireGuard is the right default for phone use.
Choosing a server too far away
A VPN server in London when you’re in Chicago will noticeably slow your connection. For general privacy use, pick a server in your own country or a neighboring one. Geo-switching to access content from another region is a separate use case where distance is expected.
Leaving all apps in the VPN tunnel
Split tunneling lets you specify which apps route through the VPN and which connect directly. On Android, this is available in most major providers’ apps. Banking apps on their own secure channels, streaming apps you’re not using for geo-access, and apps you trust can all be excluded — which reduces battery drain and improves speed for everything else.
Does a VPN Drain Your Phone’s Battery?
Yes, but less than most people assume. VPNs encrypt and decrypt every data packet, which adds CPU load. Independent benchmarks from 2024 and 2025 found that high-level encryption can increase CPU usage by 10-17% under sustained VPN load, with battery consumption rising by roughly 5-8% during active use.
WireGuard uses significantly less power than OpenVPN — in controlled testing across Android 14 and iOS 18, WireGuard averaged 12-18% lower battery usage over 4-hour sessions compared to OpenVPN on mixed networks.
The practical difference on a modern phone: you might end the day with 3% less battery than without a VPN running. The screen, streaming apps, and signal searching do far more damage than the encryption overhead.
To minimize battery impact: use WireGuard where your provider supports it, enable split tunneling to exclude apps that don’t need the VPN, and use Always-On rather than repeatedly toggling the connection (reconnecting uses more power than staying connected).
Frequently Asked Questions
Does a VPN slow down my phone’s internet?
A good VPN on a nearby server reduces speeds by 5-15%. A bad VPN or a server in a distant country can cut speeds by 50% or more. WireGuard is the fastest protocol currently available. Run a speed test at fast.com before and after connecting to see the actual impact on your connection.
Should I leave the VPN on all the time?
On public Wi-Fi, yes — always. On mobile data, it’s worthwhile if privacy from your carrier matters to you. At home on your own router, it’s optional; the main benefit there is hiding traffic from your ISP. Many people use split tunneling or scheduled VPN rules instead of running it constantly.
Can I use a VPN on my phone for free?
ProtonVPN offers a genuinely free tier with no data cap, no ads, and an audited no-log policy — it’s the most credible free option available. Windscribe offers 10GB per month free. Most other free VPNs carry real privacy risks. Avoid any free VPN that doesn’t publish an independent audit of its logging practices.
Will a VPN hide my activity from my employer or school?
If you’re on your employer’s network or using a device they manage, a VPN won’t provide complete cover — network-level monitoring and MDM profiles can still log activity. A VPN on your personal phone on your own data connection hides your traffic from your ISP but not from the websites and services you log into.
Is using a VPN on my phone legal?
In the US, UK, Canada, Australia, and most of Europe, VPNs are completely legal. Some countries restrict or ban them: China permits only government-approved VPNs, Russia requires VPNs to comply with content blocking rules, and a small number of countries have outright bans. If you’re traveling, check the rules for your destination country before relying on a VPN.
Conclusion
Setting up a VPN on your phone is a five-minute job. The difference between a VPN that works and one that only looks like it works comes down to three things: enabling Always-On or Connect on Demand so coverage doesn’t drop between networks, turning on the kill switch so your real IP never leaks when the connection drops, and testing for DNS leaks once to confirm the setup is actually doing what you think it is.
Start with ProtonVPN or Mullvad if you don’t have a provider yet — both have audited no-log policies, WireGuard support, and apps that configure correctly without demanding extra setup. Run a DNS leak test after setup, then forget about it. That’s the whole job.
Packed with purpose and packed with value—read our goal-crushing blog posts.